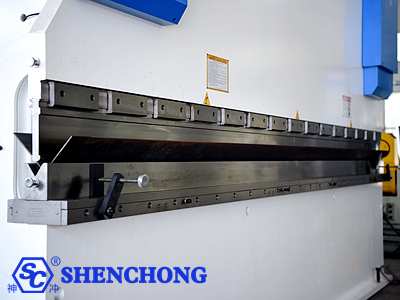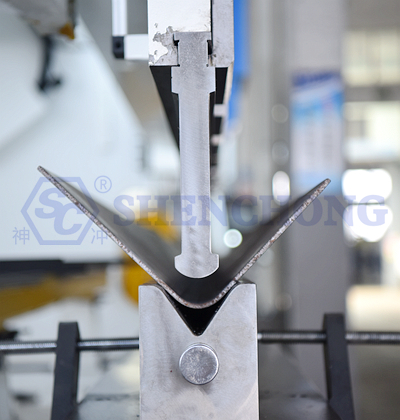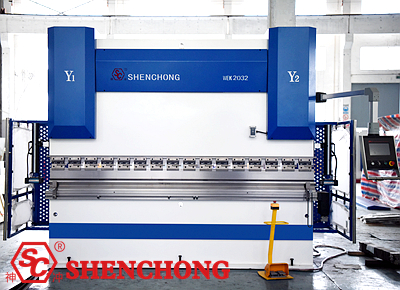
Steel sheet bending may seem similar to bending ordinary carbon steel, but in reality, it presents many challenges: high springback, easy scratching, inaccurate angles, and rapid die wear.
Below, we provide a complete, workshop-level guide, organized by principle → process → die → parameters → operating techniques → common problems → practical tips.

First, understand why it's difficult to bend:
Stainless steel has high yield strength and low elongation. Springback is typically 30%–60% greater than carbon steel. This is more pronounced in harder materials (304H, 316L, duplex steel).
Brushed/mirror/coated finishes are easily damaged by a single scratch, resulting in extremely high rework costs.
Stainless steel is "very unfriendly" to dies. Ordinary dies experience a lifespan reduction of over 40%.
Grade | Bending difficulty | Characteristics |
201 | ★★☆☆ | Hard, high resilience |
304 | ★★★☆ | Most commonly used |
316/316L | ★★★★ | High toughness, obvious resilience |
430 | ★★☆☆ | Brittle, easily cracked |
Pay close attention to the minimum bending radius for 201 and 430.
The thickness fluctuation of stainless steel plates is greater than that of carbon steel. A thickness difference of 0.1 mm within the same batch is very common. Actual measurement is essential before press brake bending!
Bending line ⟂ Rolling direction → Optimal
Bending with the grain → Prone to cracking, unstable angle
Especially important for brushed steel plates.

Stainless steel must use a "large V" groove.
Plate thickness t | Recommend V-groove |
t ≤ 1.5 mm | 8t~10t |
2–3 mm | 10t~12t |
4–6 mm | 12t~14t |
≥8 mm | 14t~16t |
Insufficient V-groove = high springback + surface damage
Rounded corner upper dies are preferable to sharp corner dies.
Upper die radius ≥ 1.0~1.5 × plate thickness.
Chrome-plated/polished upper dies are preferred.
Sharp corner dies are prohibited for mirror-finish plates.
42CrMo ≥ Ordinary T8
High-frequency quenching, surface hardness ≥ HRC52.
Process | Recommendation | Note |
Free bending | ⭐⭐⭐⭐ | Preferred choice |
Correction bending | ⭐⭐ | High risk of crush injury |
Bottoming bending | ❌ | Unless specifically requested |
Stainless Steel ≈ Carbon Steel × 1.3~1.5
Example:
Carbon Steel 2mm: 20 tons
Stainless Steel 2mm: 26~30 tons
Target angle | Actual settings |
90° | 86°~88° |
60° | 56°~58° |
120° | 124°~126° |
Larger angle first → Smaller angle later. Inward fold first → Outward fold later.
Avoid "dead corners" that prevent part removal.
Laminated sheets with the film facing outwards.
Apply nylon tape/PVC protective strip to the lower die.
For mirror-finished sheets, use kraft paper/Teflon film.
Deflection compensation is essential for workpieces over 2m in length.
Point bend in the middle first → correct at both ends.
Larger is better than smaller.
Smaller V-groove → Greater springback + heavier indentation.
Recommended: V = 10~12 × sheet thickness
Apply 1°~2°more pressure.
Release the die → lightly press to trim the corner.
Especially effective for thick stainless steel.
Bending line ⟂ Rolling direction → Most stable.
Bending with the grain → Prone to cracking, unstable angle.
Too small a radius → Risk of cracking.
It is recommended that the inner radius≥the plate thickness.
Even within the same 304 stainless steel, different batches can vary greatly.
If the batch changes, the parameters must be readjusted.
Correction bending angle is accurate.
But: severe pressure damage, rapid die wear.
Unless the dimensional tolerance requirements are extremely strict.
Iron filings on the lower die = indentation will inevitably remain
Mirror panels must be wiped clean before bending.
Start with slow contact and gradually increase pressure to prevent "over-pressure".
Springback and pressure are completely different.
The CNC system should have a separate "stainless steel" material library.
Below is a "Steel Sheet Bending Parameter Quick Reference Table by Plate Thickness," assuming common 304/316 stainless steel, free bending, and a 90°target angle. It's ready to use immediately.
Applicable Conditions:
- Material: 304/316 Stainless Steel
- Bending Method: Free Bending (Non-Corrected)
- Lower Die Opening: V = 10~12 × Plate Thickness
- Upper Die: Rounded Corner Die
- Length: 1000 mm (Pressure per meter)
Plate thickness (mm) | Recommend V-groove (mm) | Upper die fillet radius (R) | Actual pressing angle | Bending force (t/m) |
0.8 | 8 | R1.0 | 87° | 4–5 |
1.0 | 10 | R1.0–1.5 | 87° | 6–7 |
1.2 | 12 | R1.5 | 86.5° | 8–9 |
1.5 | 16 | R2.0 | 86° | 10–12 |
Plate thickness (mm) | Recommend V-groove (mm) | Upper die fillet radius (R) | Actual pressing angle | Bending force (t/m) |
2.0 | 20 | R2.0–2.5 | 86° | 18–20 |
2.5 | 25 | R3.0 | 85.5° | 22–25 |
3.0 | 30 | R3.0–4.0 | 85° | 28–32 |
Plate thickness (mm) | Recommend V-groove (mm) | Upper die fillet radius (R) | Actual pressing angle | Bending force (t/m) |
4.0 | 40 | R4.0–5.0 | 84.5° | 45–50 |
5.0 | 50 | R5.0–6.0 | 84° | 60–65 |
6.0 | 60 | R6.0–8.0 | 83° | 75–85 |
Plate thickness (mm) | Recommend V-groove (mm) | Upper die fillet radius (R) | Actual pressing angle | Bending force (t/m) |
8.0 | 80 | R8.0–10 | 82° | 120–140 |
10.0 | 100 | R10–12 | 81° | 170–190 |
12.0 | 120 | R12–15 | 80° | 230–260 |

Uneven sheet thickness → Zoning parameters
Lower die V-shape too small
Machine deflection compensation not activated
Bending radius too small
Follow-grain bending
430/201 material issue
Lower die groove too small
Die not polished
Excessive correction pressure
Inaccurate back gauge
Sheet material not properly adhered
Upper die wear